SharePoint 2007/2010 development using C# and Powershell. Mostly just things I have found that make my job easier but I had to search around to find answers to.
Monday, November 23, 2009
SP2010 PDF Icon - Quick Install for x64 bit systems
Tuesday, May 19, 2009
SharePoint 2003 - Renaming a Sub Site
A little issue I ran into this past week was that we needed to rename a Subsite on our old 2003 Portal that is still hanging around. Initially I thought I could use the Alternative Access Mappings but this only works for a FQDN, not for individual subsites, for those you have to use SharePoint Designer.
Open the site you need to rename in SharePoint Designer, then select 'Site > Site Settings', you can change the 'Web name'. This will change the URL and updates all appropriate links. Any links that may have been hard coded into say a Link webpart will have to be updated manually, although your users will let you know soon enough if you missed anything! ;)
Also all checked out documents need to be checked in otherwise you will get an error saying Document name is checked out, luckily it gives you the URL to find the document and check it back in.
Wednesday, May 6, 2009
SharePoint 2007 List Workflow - Send an email to users when an item is changed
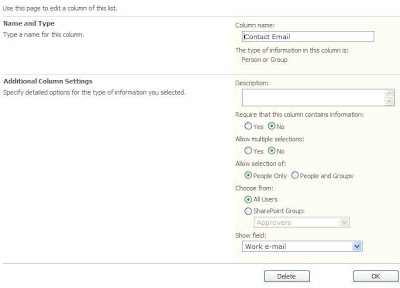 The columns need to auto populate the data, so in this column we set the field to Work e-mail, so that when the Workflow runs it will put the users email address into the view of the list. Keep in mind when you are editing the list item you will see the users name in this field, like so:
 But when you look at the item in the list you will see the data like so:
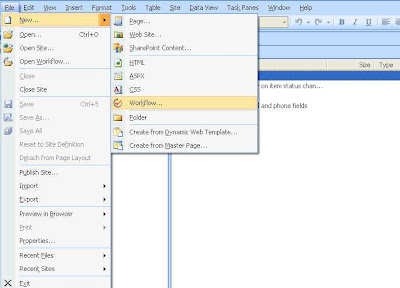
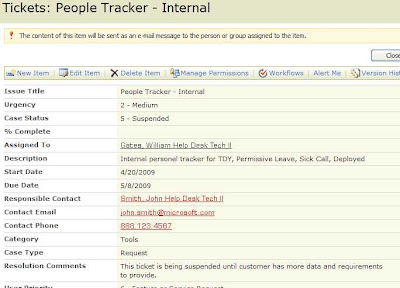 It is helpful to have this information so that I don't have to look it up every time I need to contact someone about an issue I am working on. This information is populated every time a new item in the list is created, which makes perfect sense. To do this you need to open SharePoint designer, which is now a free download.Once you open SPD and you navigate to the site where your list resides, Click File > New > Workflow. This will start the Workflow Designer.
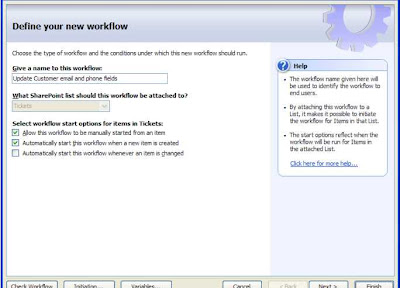
 You will now need to configure a few settings such as the name of the workflow and start options. You will want the workflow to start Automatically when a new item is created.
 Since you need this workflow to start when a new item is created you will not need to add any Conditions. We will select the Update item from the Actions button and then select the list you want to work with, in this case it is Tickets.
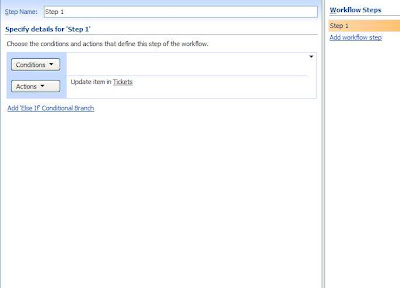 Now you can click on the Tickets link and a new window will pop open
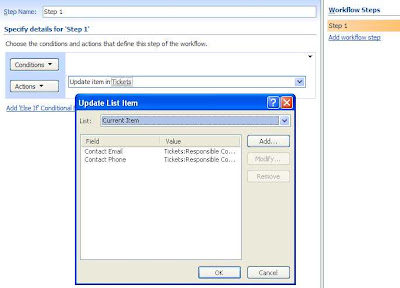 Click the Add button and select the field you want to populate, in this case it will be Contact Email
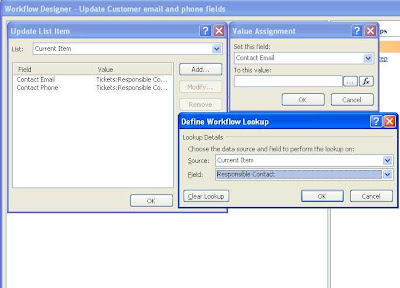 Now click the fx button so we can use one of the fields that contains the users data as the look up source. In this case our list uses a column called Responsible Contact, the reason we did this is because sometimes users will open a ticket and assign it to someone else, like for example when someone bypasses the ticket system and calls me directly I want to be able to create a ticket and make them the responsible contact, also if they are having an issue getting on the portal they may not be able to use the help desk site to submit a ticket, you could also use the Created by field, but that would be too limiting for our needs.
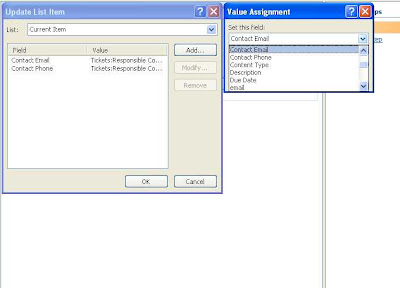 Click Ok 2x and you should be good to go. You can click Finish and now go back to your list and create a new item. Once the item in the list has been created you will be taken back to the main list and the additional information has not populated, you just need to refresh the page to see it, I am not sure why it does this, unless it has something to do with caching of the page.
You can use this process to do all kinds of cool things that would ordinarliy take a few extra mouse clicks through out your day. The next step in this process is to send an email to the Responsible Contact whenever the person working on the ticket updates the information in the ticket. This feedback was a request by the users so they would not have to constantly go into the list to see what was happening with the issue.
We needed to capture the users email address in order to do this with out having to code a solution in Visual Studio. So all the previous steps we did were in anticipation for this next step. We also have to use 2 seperate workflows in order to make this work correctly, otherwise you will get an error trying to combine an update and fire off the email in the same workflow, beleive me I spent a whole day trying to make it work with no luck! ;)
You should still have SPD open, so again click on File>New > Workflow to start the Workflow Designer. Name your workflow something clever, select the list you want to work with, I will use the Tickets List again, and select the Automatically start this workflow whenever an item is changed. Click Next, this time we are going to set a condition so that the workflow will know to send an email when the Case Status column has been updated, this is a business rule for us, when we take control of a ticket in the queue we are supposed to update this drop down with a new status.
Click the Conditions button and select Compare Tickets field
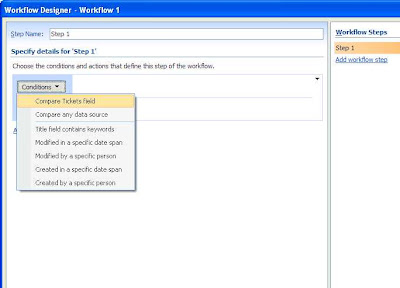 Once that is done you will see
 Here you will click on field and select the Case Status and then click on equals and change it to "does not contain" click on value and I will select 1 -New, which is the default status for all tickets when they get created. Remember we only want to send an email when the Case Status changes from 1-New.
Now that you have set the Condition its time to set the Action, which will be to Send an Email. Click the "this message" text to open the message editor window.
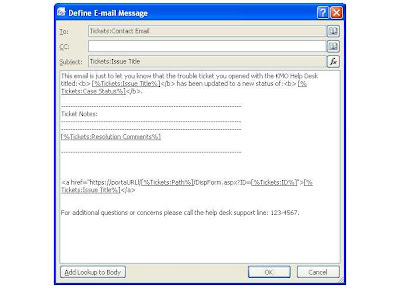 Here you are seeing the message I composed with values selected from the list that will give the user some basic information such as the ticket name, the status of the ticket, and the comments that the tech working on the ticket wrote. We also include a link to the ticket so that the user can take a look or provide feedback or requested information.
A note on the link back to the ticket, is that you will have to write out the url mostly by hand.
 For some reason Microsoft apparently did not think that users would need to use a workflow with lists in the same way we do with document libraries. For example any time a change is made to a document in a doc library you can select the user or group of users to be notified with one of the built in workflows that come out of the box, however for a list this is just not possible without creating a custom workflow like we just did.
Wrapping this up you can send an email to the Responsible Contact now by clicking on the Address book icon in the To: line and select the Workflow Lookup, click the Add button select the Contact Email in the field drop down.
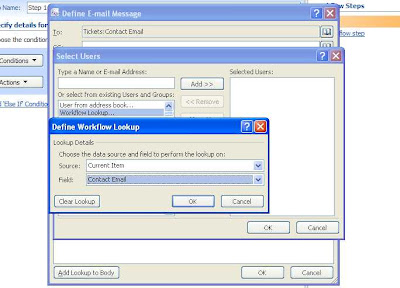 This is the so far been the easiest way to automate this task. And yes I am well aware of the option to use Alerts to do this same type of task, however you can not expect the user to set an alerts.